Showing posts with label Recipes. Show all posts

Sunday, August 11

Mr BC's Birthday!!

It was Mr BC's birthday over the weekend so I thought I'd better bake him a cake.  This year proved to be abit of challenge for me ... you may be asking why?  Well Mr BC has just been diagnosed as lactose intolerance.  So my mission was to bake him a cake that was super tasty but also something that he could enjoy and not make him feel sick.

Mr BC's Birthday Cake


I ended up baking a chocolate cake which is both lactose and gluten free.  It was absolutely delicious! A very moist decadent cake filled and covered with a vegan chocolate "buttercream".


It was so lovely to bake this for Mr BC!! It may have been a simple decorated cake but it was a cake made with alot of love and Mr BC was very grateful that he could have his cake and eat it too.

I've had people ask on my facebook page about the recipe for the frosting so please see below the recipe for the vegan "buttercream"

I found the recipe on Sweetapolita blog.  She has also included a vegan cupcake recipe you might want to try?  I haven't tried it myself.  You can view her recipe here.

Sweetapolita Chocolate Vegan Frosting:


  • 227g/8oz Vegan, non-hydrogented margarine {I used Olivani}
  • 125g/4oz Icing sugar
  • 1 1/2 tsp pure vanilla extract
  • 145g good quality bittersweet chocolate, melted and cooled
  • 60ml Almond or Soy milk {I used soy milk}
  • Pinch of salt     
  1. In a bowl of stand mixer fitted with a paddle attachment, combine icing sugar and margarine and beat on low speed for 1 minute.
  2. Add vanilla and beat on low until combined.  Add melted chocolate and beat on medium until smooth, about 2 minutes.  Add soy milk and salt and beat on medium speed for 1 minute.
Ok so I got to this stage and my frosting was looking rather gross!! It was really soupy and look like it had curdled. I was about to throw it away but decided nope! I've got to see if I can save it!  So I kept adding icing sugar and beating it.  In the end it turned into a beautiful frosting and was so happy that I could save it and use it on the cake.  I would say that I probably added at least another 200g or so of icing sugar.  My suggestion is to keep adding small amounts at a time until you get the consistency you are wanting.

Happy Baking!


Friday, July 12

Creamy Coconut & Mango Rice Pudding

Mr BC has been diagnosed as lactose intolerant, which means I have the fun job of finding new recipes for our sweet fix which is dairy free.  I came across this wonderful blog called Cook Republic.  What a fabulous blog, I absolutely love the photos and I aspire to be able to be a food photographer like her one day.  Anyhow back to the story... On Cook Republic's website I found something which just tickled my taste buds.  A coconut and mango rice pudding.  Doesn't that sound delicious!  Well both I and Mr BC thought so.  I couldn't wait to give the recipe a crack!  Last night I made this wonderful concoction and here are the results.


A rick creamy melt in your mouth rice pudding with lovely coconut flavor topped with the tang of the ripened mango and crispiness of the toasted coconut threads.  This really was a wonderful winter treat.


This recipe is truly made with love as it took over an hour to make and you have to stand over it and stir and love the rice.  As Sneh {Face behind Cook Republic} said "The secret to a good rice pudding is time and love." and I couldn't agree with her more.


The flavours really made me think of my mama's sweet desserts and evoked memories of my childhood of asian sweet puddings.  You can read and view Cook Republic's recipe here.  I've included the recipe below with a few changes that I had made while making my last night.


Creamy Coconut and Mango Rice Pudding | Serves 6

3/4 cup thai jasmine rice {soak rice in water for an hour before hand}
2 cans coconut milk
2 cups water
1/2 cup raw sugar
2 pinches salt
2 tbs vanilla extract
Ripened mango cut into small cubes
Toasted coconut threads


  1. In a heavy bottomed pot put in the soaked rice, 1 can coconut milk, 2 cup water, raw sugar, salt and vanilla extract.  Place pot over a medium to low heat and stir continually for 20 minutes until it comes to a boil.
  2. Lower the heat and let the rice pudding cook, stirring frequently for the next hour or so.  During this time keep adding the remaining can of coconut milk about 1/4 can at a time to the pudding.  After an hour you should have a rich and creamy pudding.  Remove from heat and let cool.
  3. Dry toast your coconut threads in a small fry pan and cube your mango.
  4. Spoon generous  amounts of pudding into a bowl top with cubed mango and sprinkled with toasted coconut threads.  
I hope you enjoy!!


Happy Pudding!


Monday, May 14

French Macaron Journey Take Three!

I have been in the kitchen again obsessing over macarons.  Armed with more knowledge from my last trials, I felt a huge amount of confidents.

I can happily report back that there were no tears or tantrums this time around and I found them rather quick to make!! I spent a total of about 2 1/2 hours and managed to bake 3 batches of macaron shells that I was pretty happy with. {insert HUGE smile & happy dance}

I have used the french meringue technique and really find this method enjoyable to make ... well that is once you have gotten a handle on how to make them that is!!  It is least time consuming.  No need to make sugar syrup {Yippee} and my personal opinion is they taste so much more delicious.


This is one of the flavors that I made this week.  Chocolate orange and OOooo these are so good! They have such a wonderful orange flavor with the lovely sweetness of the chocolate!! Yumo!

Now! Lets got down to what I've learnt!! But before I do this I have to recommend the absolutely BEST macaron blog around!! You may already know her blog but if you haven't you MUST go over and have a good read!! She is my macaron idol and she is a wealth of knowledge!!  Introducing Ms Humble from Not so humble pie.  I have used her recipe and read up on all her tips and techniques and adjusted accordingly to what works for me.

Ms Humbles Basic macaron shell recipe:

120g Almond flour
200g Icing sugar
100g Egg whites
35 g sugar
1/4 tsp cream of tartar
Food colouring gel

Technique:

Line your baking trays with baking paper.

In your food processor place your grounded almonds and icing sugar and blend well.  Now sieve and place aside.

Weigh out your egg whites {I don't age my egg whites} and place into a large stainless steel mixing bowl.  I use my kitchenaid mixing bowl for this.  Please remember you must have an extremely clean and dry bowl to have success with your meringue.  Put your cream of tartar and sugar into your egg whites.  I use my Kitchenaid to make my meringue using my whisk attachment.  Whisk your egg whites at speed 1 for a few seconds just to loosen your egg whites then increase to speed 4 and whisk for 3 minutes.  Once the 3 minutes is up increase to speed 6 and whisk for another 3 minutes.  Your meringue is know ready to add color.  Add food coloring gel to deserved tint and whisk at speed 6 for 1 minute.  Your meringue is now ready.

 Add 1/4 of almond/sugar mixure into your meringue and carefully mix using a silicone spatula.  Keep adding the almond/sugar mixture 1/4 at a time until your meringue and almond/sugar mixture is well combined and you have a lava like consistency.  Remember you don't want to overwork your batter!!! So just take your time with this step.  

Once your batter is at the right consistency spoon batter into your pipping bag.  You are now ready to pipe  your shells.  I pipe my shells to approx 3 cm.

Pick up your tray of piped macarons and tap the tray quite hard { I pick up my tray and then drop it onto the table a couple of times } to remove any air bubbles in the mixture.  Use a toothpick to pop any remaining air bubbles.

 Now let your macrons chillax {or rest} for 30 minutes or until they are no longer sticky when you lightly touch them.

While your macarons are resting pre-heat your oven.

Ok now this is where it gets tricky! Oven temperatures.  I bake my macarons at 140 degrees for 16 minutes and I find this works really well for me BUT this may or may not work well for you.  My oven is an industrial oven which has a fan.  If you are using your home oven I would suggest trying them at 150 degrees.  My best suggestion is to trial a range of temperatures from 140 to 160 degree and time ranging from 15-20 minutes to see which works best for your oven.  I found it very usefully to write down the time and temperature you are trialling  with each batch and the finished outcome.  You will eventually find a temperature and cooking time that works perfectly for your oven.

Once they are baked leave them on the trays till cooled.  They are now ready to be filled.

Usefully tips: 

  • Buy yourself an oven thermometer - this will be one of the best things you will buy and will make a huge difference to learning about your oven.  They are not at all expensive.  You can pick one up for bout $10
  • If when removing them from the tray and they are a little sticky place the tray of macarons into the freezer for about 5 minutes and they will come away from the baking paper very easily.


There are so many different types of fillings you can make!! 

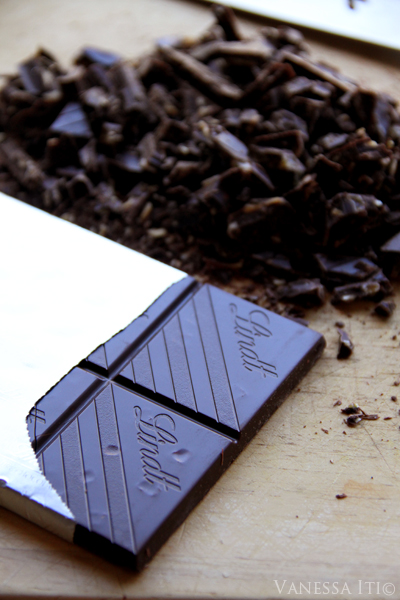
Here is my recipe for my chocolate orange ganache filling:

180g Lindt's chocolate orange chocolate {finely chopped}
180mls Cream
Zest of 4 oranges


In a small saucepan add your cream and orange zest.  Place on a stove and gently bring to a boil.  Now set aside for 15-20 minutes for the orange zest to infuse the cream.

Meanwhile place chocolate in a bowl.  Place bowl over a pot of simmer water {making sure that no water is touching the bowl and gently stir until the chocolate is melted.

Strain your cream, making sure to get all the cream out from the orange zest.  Place cream back onto the stove and bring back to a gentle boil.  Add to the chocolate and stir until well combined.

Place your ganache mixture into your fridge until it is at the right pipping consistency.  This should take about 20 minutes.

Now pipe onto your macaron shells.  Place your macarons into an airtight container and put into the fridge for 24 hours and let the maturing beginning.  Your macarons are now ready to be enjoyed.

Here are the other 2 batches that I trialled this week:

Introducing My Lemon & Blueberry Jelly Macarons


Lemon zest infused shells with a lovely lemon ganache


with a lovely homemade blueberry jelly center!


The homemade jelly was so fun to make!!


And now introducing my Green tea and passion fruit macarons


Ooooo these are so so so so yummy!! A green tea infused shell with a sweet and tangy passion fruit swiss meringue buttercream.  When you bite into these little morsels you first get hit with the lovely tanginess of the passionfruit and towards the end you get the soft flavor of the green tea!! They are pure dreaminess!

Please Please Please! remember that I am by no means a macaron maker!!  I am just obsessed with these little beauties and really love the challenge of making them.  My best advice is to keep at it! Like me I have been through lots of tears and tantrums to get to a place that I am happy with.  

Please go and read Ms Humble's Macaron 101 : French Meringue post.  I have learnt so much from her and I'm sure you will too.


Happy Macaron baking!!


Saturday, March 31

Chocolate tarts with the last of the summer berries

There is nothing nicer then a small parcel of sweet chocolate ganache and sweet and tangy summer berries.  I think these will be the last of the summer berries ... which is very sad.  While I was making these Isabella just couldn't help herself and was picking on both the blackberries and blueberries.


They are so simple to make, if you have the time then you can make your own sweet pastry cups, but if you don't you can buy store brought cups too.  I felt they need a pop of color as I couldn't find any raspberries so made some of my simple blossoms in a gorgeous pinky red tone.  I think they really added a lovely element to the tarts.


I thought I'd share my ganache recipe for my tarts and it really is super simple. {Please note this is not the same ganache I use to ganache my cakes.}

My simple ganache:

Makes approx 25 small chocolate tarts.

Ingredients:

220g Good quality dark chocolate {I use callebaut dark chocolate}
20g Castor sugar
200mls Pouring cream
50g butter {cut into small cubes}

Method:

1. Place cream and sugar into a heavy base pot and bring slowing to almost boiling.

2. Pour cream into a chocolate and whisk until mixed through.

3. Add the butter to the ganache mixture, 1/3 at a time and stir until mixed through.

4. Ganache is now really to pour into your buttery pastry cups.


I make them the night before and left them in a tupperware container so the ganache had time to set.  About 2-3 hours before you need to serve decorate with your choice of summer berries and blossom.


The ganache will just be set on the top but when you bite into it there is a delicious soft chocolate heaven that will tantalize your taste buds.  Mmmmmmm!


Happy Baking!


Monday, February 14

Lemon & Poppy Cupcake

I'm not much of a lemon flavour cupcake person but my hubby and mum just loves my lemon & poppy cupcake. It is sweet but tarty and the poppy seeds adds a lovely texture.


Makes approximately 30 cupcakes

{Ingredients}


350g white chocolate
225g unsalted butter
300ml water

300ml freshly squeezed lemon juice
3 eggs
400g castor sugar
400g self-rising flour
Handful or so poppy seeds
Lemon extract or essences


{Cooking Steps}

1. Pre-heat over to 150 degrees Celsius and prepare 3x 12 hole cupcake trays with cupcake cases.

2. In a saucepan add the white chocolate, butter, water and lemon juice. Place on a low heat
and stir until chocolate and butter are melted. Leave to cool slightly.

3. In a large bowl whisk the eggs together and slowly add the cooled mixture to the eggs -
whisking as the chocolate mixture is added.

4. Add the sugar and mix.


5. Add the sieved self-rising flour and mix till combined.

6. Add the poppy seeds and about 3-4 drops of lemon extract and mix well.

7. Pour cupcake mixture into the cupcake cases. Fill almost to the top.
{these cupcakes do not rise very much}


8. Bake in the oven for 20 minutes.

9. Leave to cool before decorating

Well I hope you all have a go at making these cupcakes!! They are a favourite in our house!

Happy baking everyone!